Saturday, February 21, 2009
Wednesday, February 18, 2009
Time Machine Setup: For first-time users
Time Machine is one of the best ways I have seen to back up your Mac. It allows you to back up all of your files, including your operating system, and then come back to them later in a very organized fashion. 
One of the most amazing features about Time Machine is that it knows when all of your files and drafts of files were on your computer. Think about the definition of a time machine. It works the same way on a Mac. You can use Time Machine to go back in time, find a file that you once had on your internal hard drive, and bring it to the present. That's what makes it the best way to backup your files out there.
The Setup:
System Requirements: Mac running OS X Leopard (10.5)
Warning: If you have a second hard drive in a Mac Pro or want to setup Time Machine over a wireless network, these following steps are not for you.
Step 1:
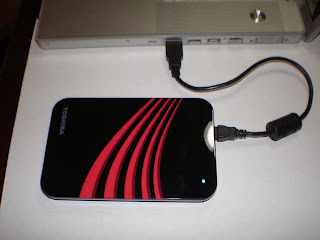
Connect your external hard drive to your Mac.

Step 2: If you connecting this hard drive for the first time, it will ask you if you would like to use the hard drive for a Time Machine backup. Select yes.
Step 3: Open up "System Preferences".
Step 4: Click "Time Machine" under the "System" section.
Step 5: If Time Machine is not already turned on, you will need to go ahead and do that. There is an on/off switch in the preferences pane.
Step 6: Select "Choose your Backup Disk" or "Change Disk"
Step 7: Choose your hard drive from the drop-down menu and select "Use as Backup".
Step 8: Time Machine is going to start backing up your whole system within a few minutes. If your external hard drive does not have a large capacity, you might want to exclude some folders. To do this, simply click the "Options" button and add some folders to the list that you do not want to back up.
Great, now Time Machine is set up. To view all of your backed up files, open the Time Machine application. Enjoy!
-Alex Bates
Please feel free to leave a comment for any reason. Let me know what you think should be added to this article or what your experience was trying to setup Time Machine.

One of the most amazing features about Time Machine is that it knows when all of your files and drafts of files were on your computer. Think about the definition of a time machine. It works the same way on a Mac. You can use Time Machine to go back in time, find a file that you once had on your internal hard drive, and bring it to the present. That's what makes it the best way to backup your files out there.
The Setup:
System Requirements: Mac running OS X Leopard (10.5)
Warning: If you have a second hard drive in a Mac Pro or want to setup Time Machine over a wireless network, these following steps are not for you.
Step 1:
Connect your external hard drive to your Mac.

Step 2: If you connecting this hard drive for the first time, it will ask you if you would like to use the hard drive for a Time Machine backup. Select yes.
Step 3: Open up "System Preferences".
Step 4: Click "Time Machine" under the "System" section.
Step 5: If Time Machine is not already turned on, you will need to go ahead and do that. There is an on/off switch in the preferences pane.
Step 6: Select "Choose your Backup Disk" or "Change Disk"
Step 7: Choose your hard drive from the drop-down menu and select "Use as Backup".
Step 8: Time Machine is going to start backing up your whole system within a few minutes. If your external hard drive does not have a large capacity, you might want to exclude some folders. To do this, simply click the "Options" button and add some folders to the list that you do not want to back up.
Great, now Time Machine is set up. To view all of your backed up files, open the Time Machine application. Enjoy!
-Alex Bates
Please feel free to leave a comment for any reason. Let me know what you think should be added to this article or what your experience was trying to setup Time Machine.
Subscribe to:
Posts (Atom)
